

Using the CLI
Rewriting an OSF Subset
You can resave a subset of an OSF file—for example the first N frames—by chaining slice and
save. The CLI currently writes all available fields; reducing the field set (e.g., RANGE only)
requires the Python/C++ APIs.
{SAMPLE_DATA_OSF_PATH} to a new OSF file¶ouster-cli source {SAMPLE_DATA_OSF_PATH} slice 0:100 save --overwrite {SLICED_OUTPUT}.osf
Clip Command
The clip command can be used to limit the range of values of different frame fields. The outcome of this command
can then be consumed by other downstream commands operation (like slam, viz, save, etc.). The position of the clip
command in the ouster-cli command chain makes a difference as it only affects operations that come afterwards.
To explore the parameters you can use with the clip command, you can use the –help flag:
ouster-cli source {HOSTNAME_OR_VALID_IN_FILENAME} clip --help
Example Usage
To keep the points within the 20 m to 50 m range and save the modified lidar frame into a PCAP file with the visualizer on, run the following command:
ouster-cli source {HOSTNAME_OR_VALID_IN_FILENAME} clip RANGE,RANGE2 20m:50m viz save {CLIP_OUTPUT}.pcap
Remember, the clip command only affects the commands after it. In the following example, the
viz command runs before the clip command, which means the point cloud modification won’t be reflected
in the visualizer but will affect the subsequent save command and the saved PCAP file:
ouster-cli source {HOSTNAME_OR_VALID_IN_FILENAME} viz clip RANGE,RANGE2 20m:50m save {CLIP_OUTPUT}.pcap
Combined with SLAM Command
The slam command has min-range and max-range parameters. When the clip command is used after
the slam command, the clip command will, by default, use the range settings specified in the slam
command. However, you can explicitly pass in the range settings to the clip command to apply different
ranges to the clip operation.
Note that the range settings in the slam command only affect the point cloud within the SLAM algorithm.
The slam range settings will not modify the lidar frame and will not affect the other following commands.
Example Usage
Experiment with the following commands using a pre-recorded PCAP or OSF file:
ouster-cli source {HOSTNAME_OR_VALID_IN_FILENAME} slam clip RANGE,RANGE2 20m:50m viz save {CLIP_OUTPUT_1}.ply
ouster-cli source {HOSTNAME_OR_VALID_IN_FILENAME} slam --min-range 10 --max-range 100 clip RANGE,RANGE2 20m:50m viz save {CLIP_OUTPUT_2}.ply
You can view the output PLY files using the open source software CloudCompare For more details about the slam command, refer to the SLAM Command
Filter Point clouds values
The filter command offers a rich set of filter options that can be used to suppress or replace the measurements
values of selected fields based on a certain predicate. Pixels values that match the predicate will be replaced by
the value of the option --invalid-value (default is zero) .
The current syntax:
# ouster-cli source {HOSTNAME_OR_VALID_IN_FILENAME} filter [OPTIONS] AXIS_FIELD INDICES
Where:
SOURCEcan be a sensor hostname or a PCAP file.AXIS_FIELDcan be either a field name such asRANGE,REFLECTIVITYor a axis in the cartesian coordinates{X, Y, Z}or image coordinates{U, V}.INDICESThe indices specifiy a range of values (e.g.,0:10) that map to the values of theAXIS_FIELD. Any value of the choosenAXIS_FIELDthat matches theINDICESwill be replaced by zero unless the option--invalid-valueis set to a different value.[OPTIONS]current options include:--invalid-value: The value to replace the pixels that match the predicate. Default is zero.--filtered-fields: A comma-separated list of fields to apply the filter to. If not specified, the filter will be applied to all fields of the frame.
Example Usage
Filter based on field values:
Consider the image from one of Ouster example sequences:
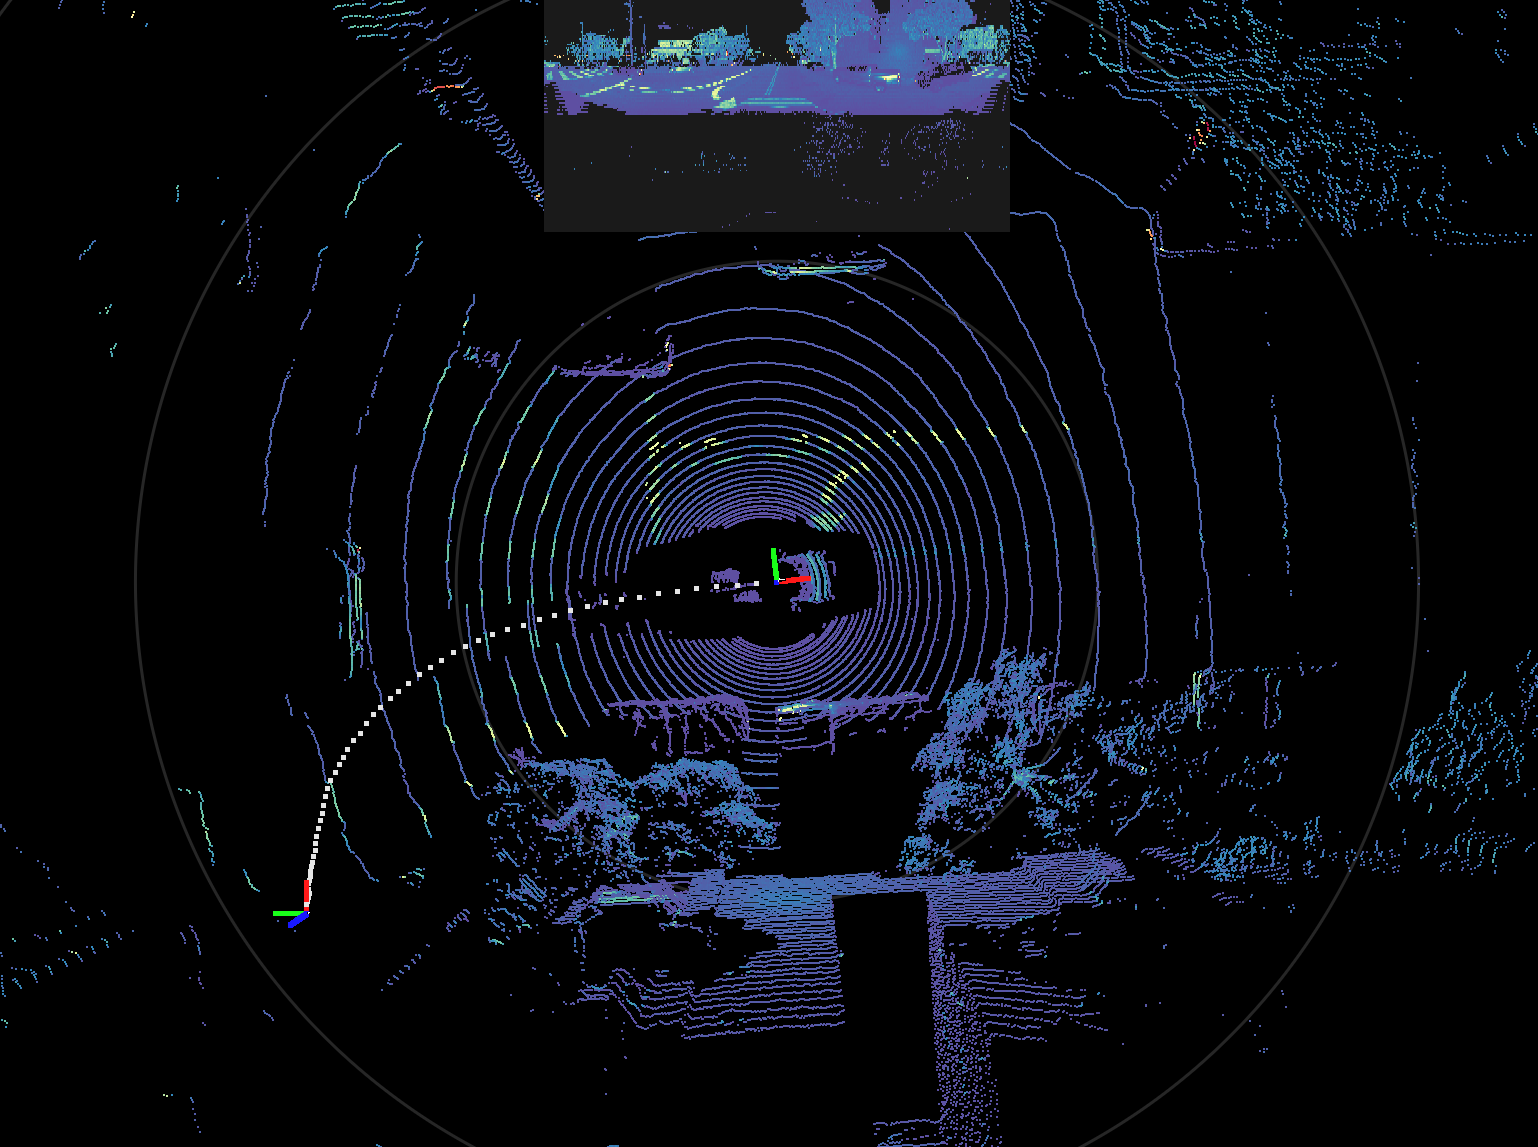
Default point cloud scene
If we apply a filter to the same sequence using the REFLECTIVITY channel and a range of value from 0 to 50 as the filter
command predicate, we can highlight points in the low cloud with higher reflectivity in the scene:
ouster-cli source {HOSTNAME_OR_VALID_IN_FILENAME} filter REFLECTIVITY :50 viz
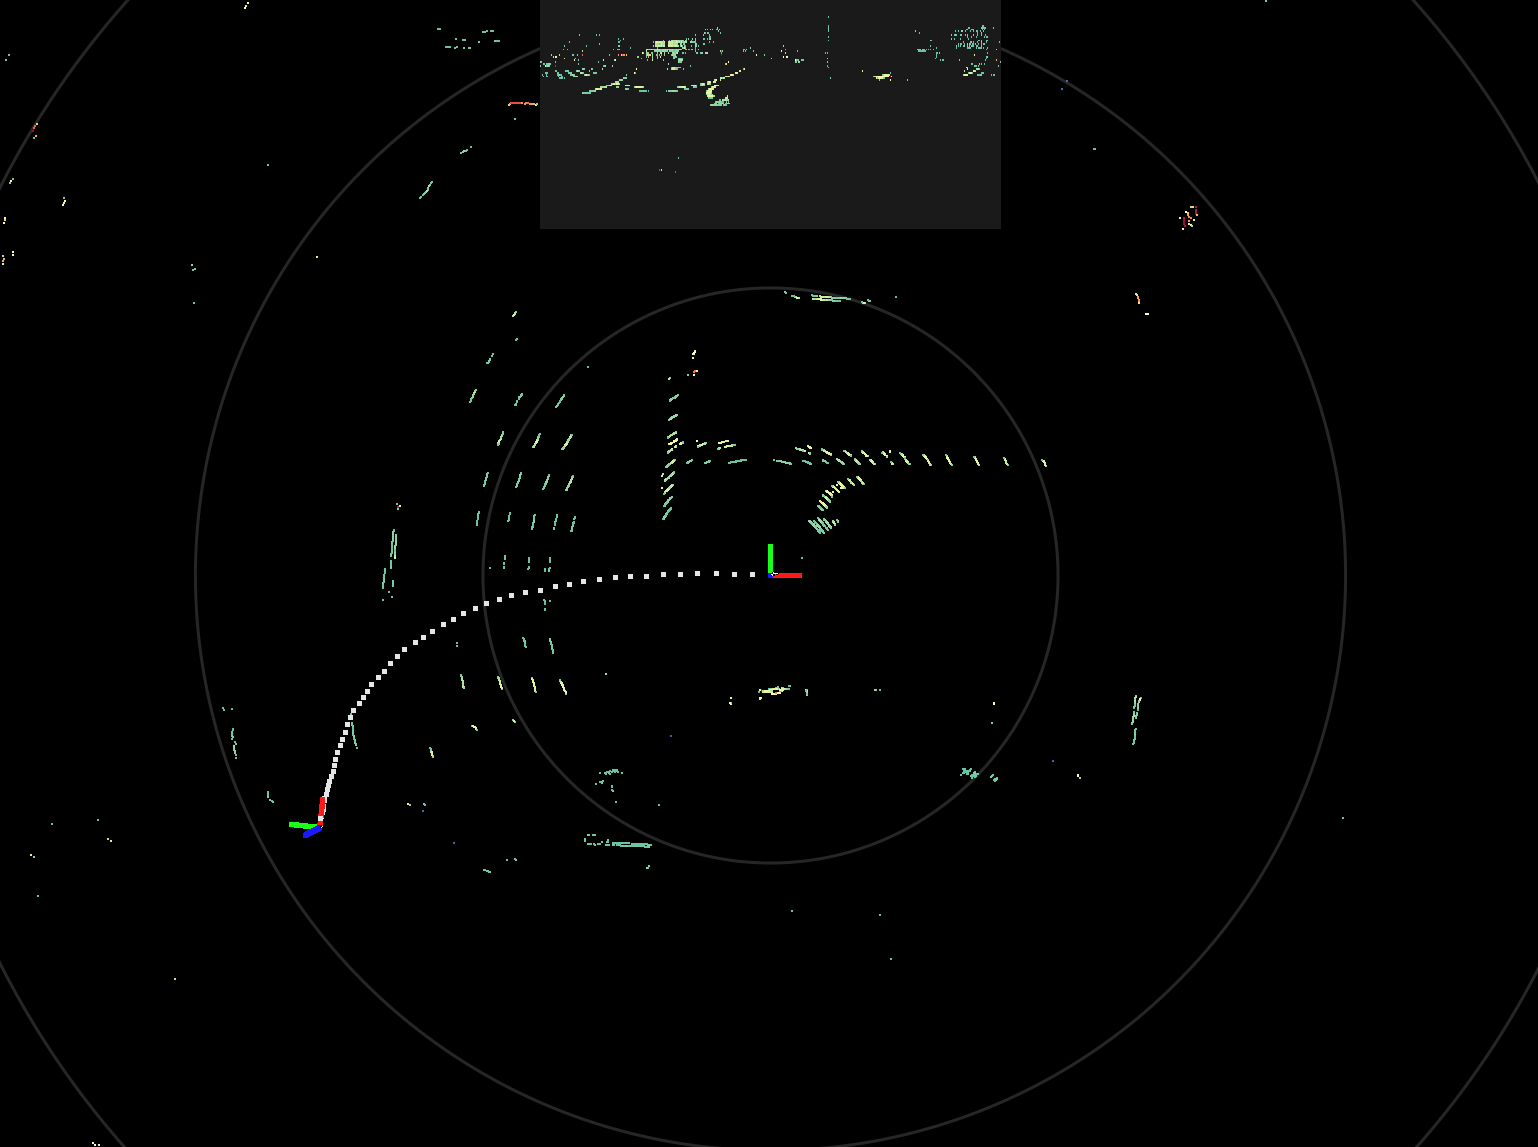
Filter by Reflectivity
Filter based on cartesian coordinates:
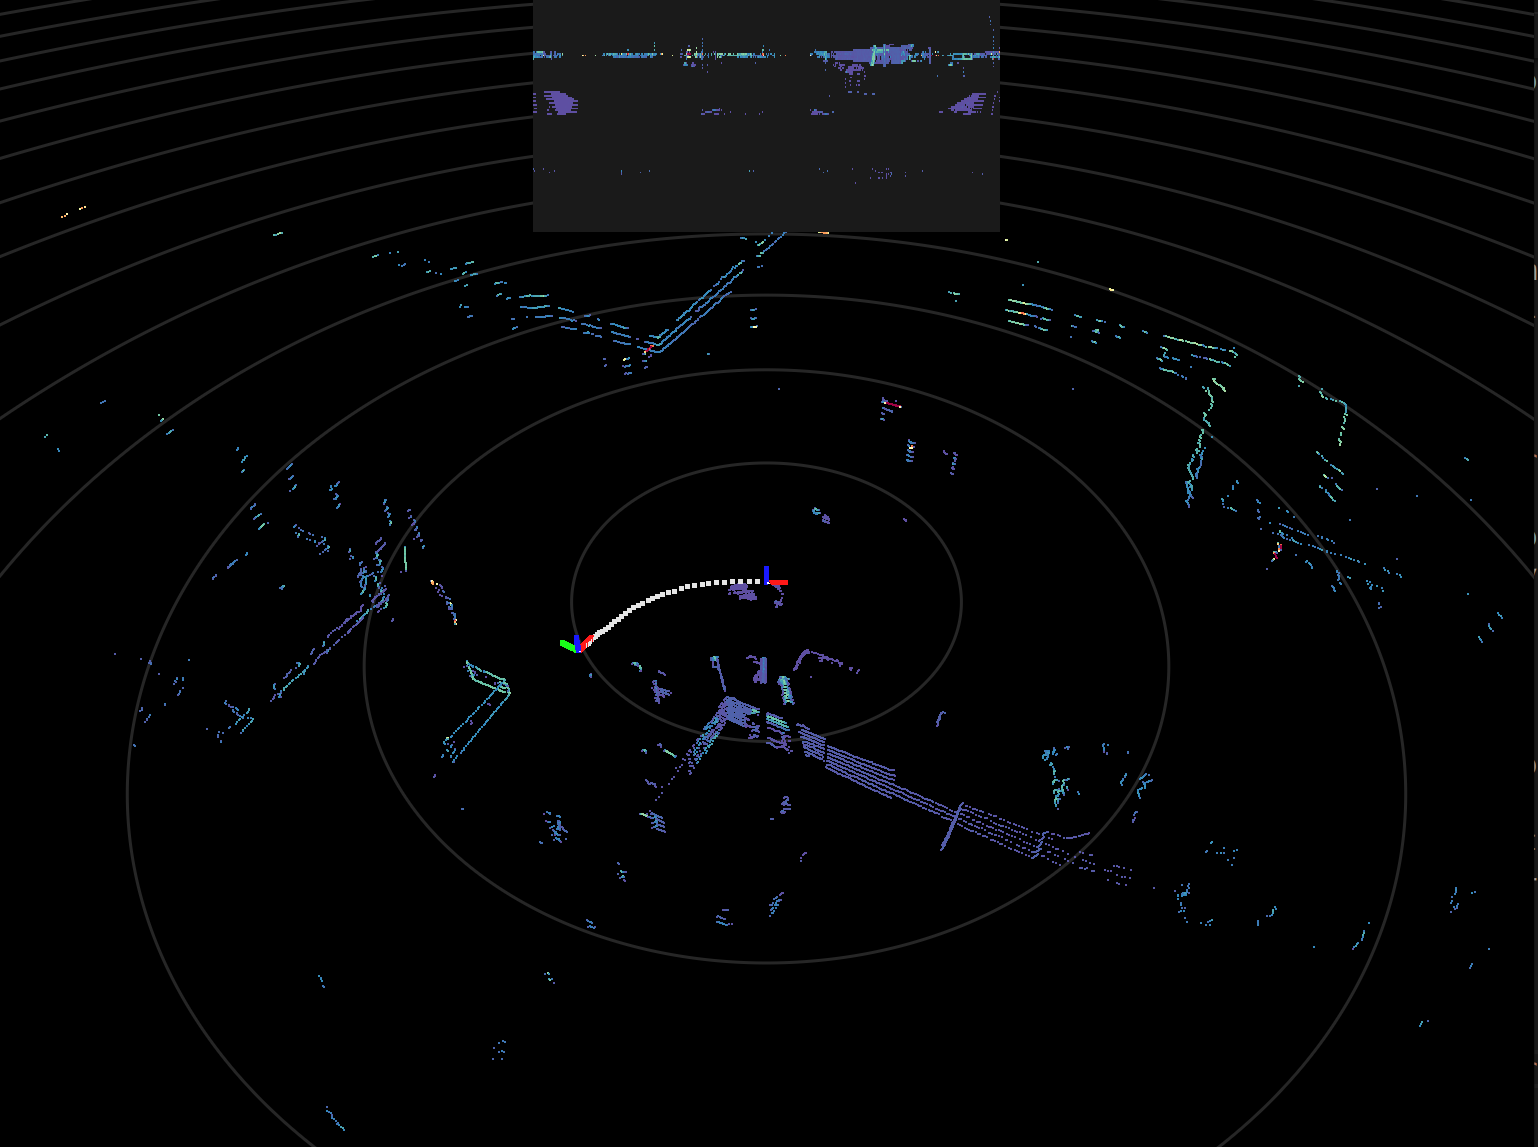
Another way to filter the point cloud is to use the cartesian coordinates of the points. For example, imagine we want to
only view the points that are +/-1 meter up or down from the sensor. We can use the Z axis to filter these points as
follows:
ouster-cli source {HOSTNAME_OR_VALID_IN_FILENAME} filter Z :-1m filter Z 1m: viz
After applying this filter the resulting point cloud will look like this:
Filter by Z
As you can see, in this example we cascaded the filter command over the Z axis to suppress the points
of the pointcloud that are outside the range of [-1m, 1m].
Filter based on image coordinates:
One more way to use the filter command is through image coordinates of the input LidarFrame. consider the following example:
ouster-cli source {HOSTNAME_OR_VALID_IN_FILENAME} filter V 256:768 viz
This command will filter the point cloud to only include points that are in the U coordinate range of 512 to 1536. The resulting point cloud will look like this:
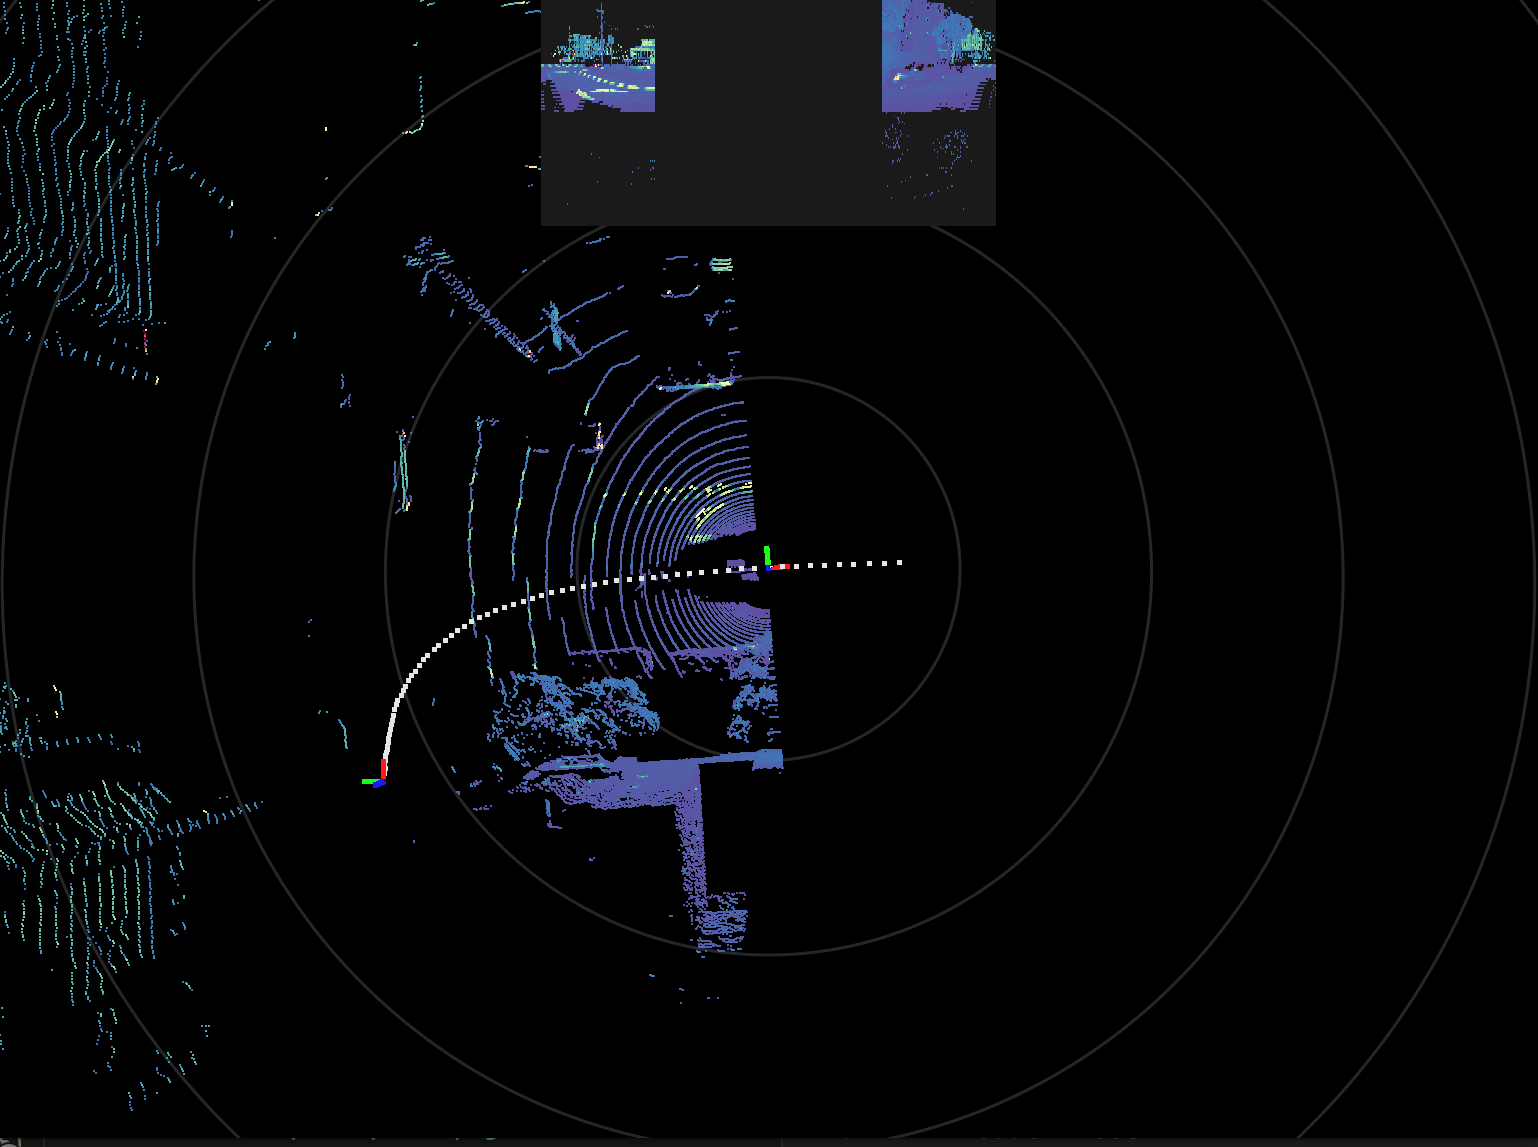
Filter by V
This can be useful to mask out certain columns (V) or certain beams (U) of the LidarFrame.
Note
When using the image coordinates for filtering PointClouds, it is important to know the dimensions of the LidarFrame as
these coordinates are absolute values in the image space and they don’t wrap around. For example, if the LidarFrame has
a size of 128x1024, then the valid range for U is [0, 128] and for V is [0, 1024]. Using values beyond that will
fail.
Here is one final example that shows the use of the options --filtered-fields and --invalid-value
ouster-cli source {HOSTNAME_OR_VALID_IN_FILENAME} filter --filtered-fields REFLECTIVITY,NEAR_IR --invalid-value 100 U 30:40 viz
The --filtered-fields option allows you to limit the channels that this filter will be applied to, while the --invalid-value
option can be used to choose a value other than zero when overriding pixel values of selected channels. Following is the outcome of
the command:
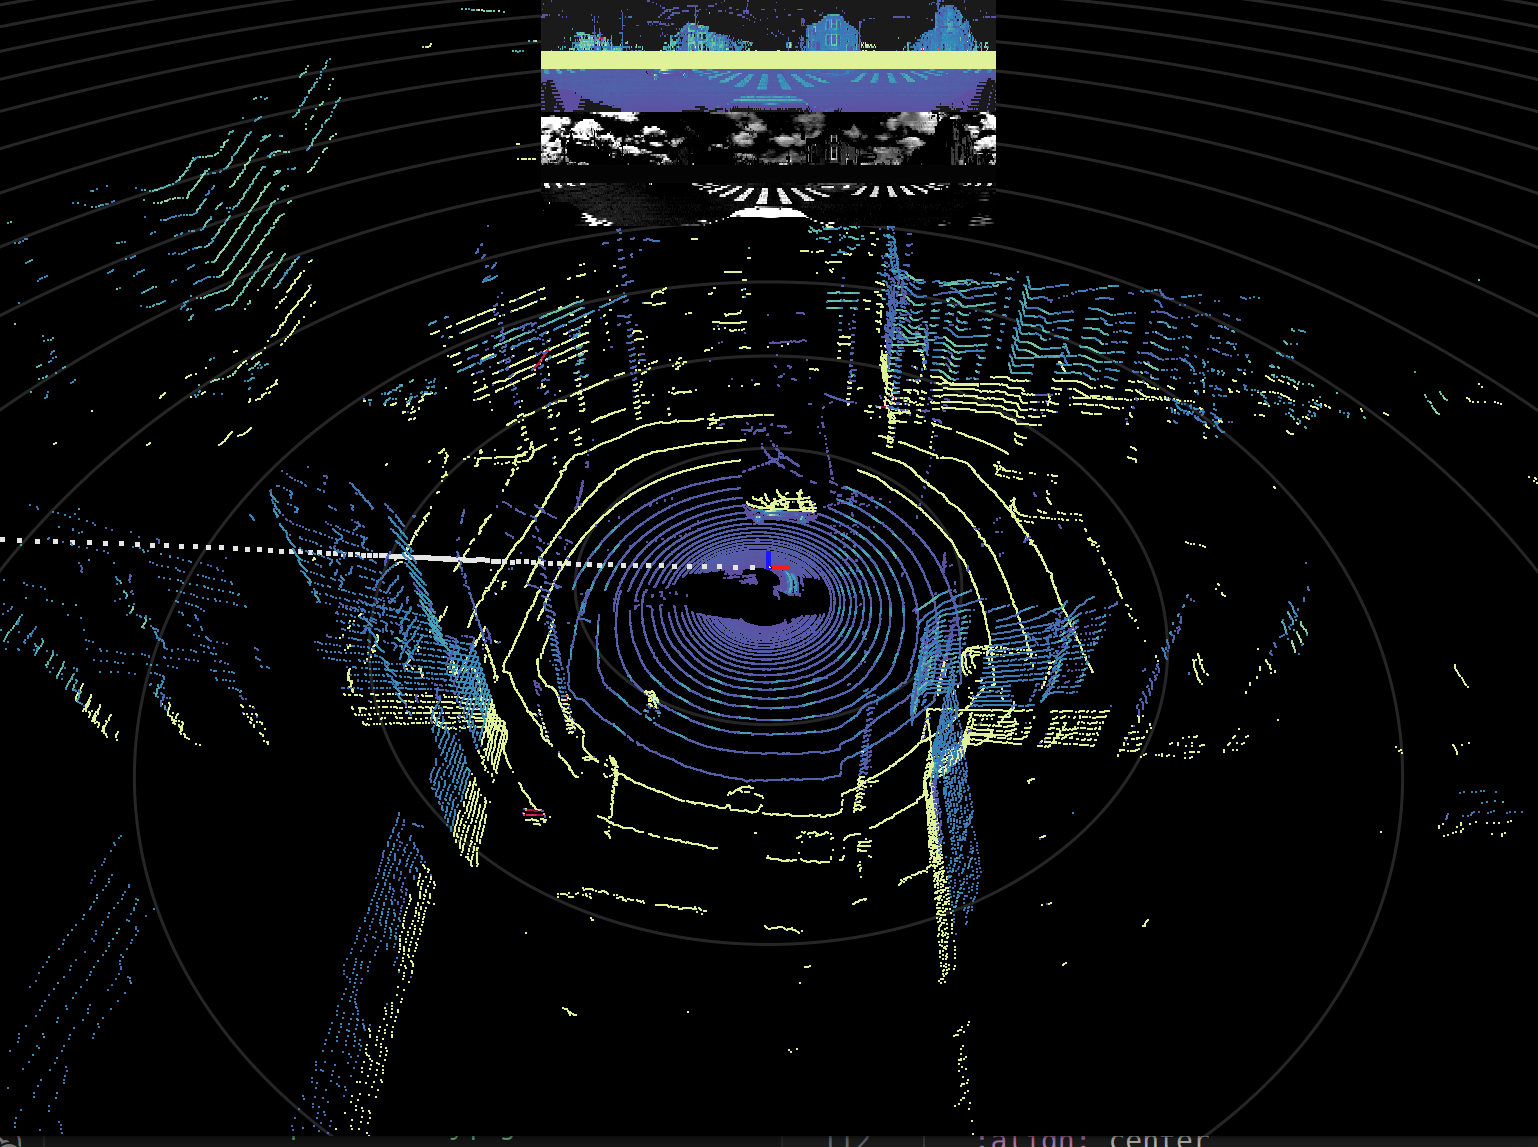
Filter by fields
Masking Lidar Data
The following command applies an image mask MASK-IMAGE to the RANGE data field of incoming
frames:
ouster-cli source {HOSTNAME_OR_VALID_IN_FILENAME} mask --fields RANGE {MASK_IMAGE} viz
The MASK-IMAGE is expected to be of composed solely of black and white pixels; black pixels
represent the pixels that will be zeroed out and white pixels represent areas of the RANGE that
will stay intact. The MASK-IMAGE is expected to have the same size of the streamed LidarFrames.
If not the command will scale the mask image to the same size as the incoming LidarFrames.
The MASK-IMAGE will be applied to all sensors in case of a multi-sensor dataset.
Reduce Beam Count
Use the reduce command to reduce the lower vertical resolution or beam count of stream LidarFrames.
For example, let’s assume you have an OS-1-128 Ouster sensor which has 128 beams, using the following
command you can reduce the effective vertical resolution of the sensor to 32:
ouster-cli source {HOSTNAME_OR_VALID_IN_FILENAME} reduce 32 viz
The reduced LidarFrames will applied to the rest of the chain, that means if you chain a save command
afterwards the generated file will have LidarFrames with 32 beams only.
One thing to note is that the beams are sampled uniformally across the original beam count.
Note
Currently, the reduce command can’t occur more than once in the ouster-cli command chain and needs
to be the very first command after the source args.