

Using the vizualizer
Pose Optimizer visualization is delivered solely through the Python
PoseOptimizerViz API and there is no standalone C++ visualizer for now.
Ouster-CLI Usage
ouster-cli simply wraps the same Python viewer under the hood. The
pose_optimize subcommand includes a --viz flag that launches the GUI
while running the optimizer:
ouster-cli source loop.osf pose_optimize --config constraints.json --viz optimized_loop.osf
Behind the scenes this flag calls the same PoseOptimizerViz class that the
Python snippets use ouster-cli just wires up the OSF, a constraint JSON
(via --config), and output path for you. Press Ctrl + S to save the optimized result before
closing the window.
The viewer also participates in the CLI auto-constraint workflow:
--auto-gpsadds GPS-derivedABSOLUTE_POSEconstraints before the window opens.--auto-loopgenerates loop-closure constraints automatically in batch mode.--auto-gps --auto-loop --vizdefers loop generation until you pressL, so you can inspect the GPS-aligned trajectory first.--no-initial-aligndisables the initial best-fit alignment computed from absolute constraints.
Python API Usage
Create a PoseOptimizer with your OSF and constraint JSON, wrap it in
PoseOptimizerViz, then run the viewer:
import ouster.sdk.mapping as mapping
from ouster.cli.plugins.source_po_viz import PoseOptimizerViz

source_name = "loop.osf"
constraints_json_file = "constraints.json"
output_osf_file = "optimized_loop.osf"

po = mapping.PoseOptimizer(source_name, constraints_json_file)

viewer = PoseOptimizerViz(
    po,
    output_osf_file,
    align_with_absolute_constraints=True,
)
viewer.run()
Keyboard Shortcuts
PoseOptimizerViz registers the following shortcuts:
Optimization & Display
N– Run one solver step. HoldShiftfor 10 steps,Ctrl + Shiftto iterate until convergence.P/Shift + P– Increase / decrease point-cloud size.H– Toggle sampled point clouds.R– Toggle the raw (pre-optimization) trajectory overlay.T– Show or hide constraint labels.C– Toggle pose-to-pose cloud highlights.M– Switch sampling mode betweenKEY_FRAMESandCOLUMNS.U– Remove currently selected constraints.Ctrl + A– Select all currently visible constraints.
Constraint Editing
L– Auto-detect loop-closure constraint pairs on the current trajectory. If auto-loop generation was deferred at startup (--auto-gps --auto-loop --viz), this key runs it on the latest GPS-aligned trajectory.U– Remove currently selected constraints. The same action is available through the on-screen[U] Remove selected constraintsbutton.Ctrl + A– Select all currently visible constraints.
Alignment & Save
G– Align the scene with gravity using IMU data from the input source, if available. The gravity rotation is cached after the first computation.Ctrl + S– Save the currently optimized OSF to the next numbered file.
Mouse Controls
PoseOptimizerViz reuses the standard ouster-viz navigation:
Left drag – Orbit the scene.
Left click on a constraint line or node marker – Select that constraint. The selected constraint is highlighted in yellow.
Click the same constraint again to deselect it.
Click empty space (no constraint hit) to clear the entire selection.
Hold
Shiftwhile clicking to add a constraint to the current selection.Hold
Ctrlwhile clicking to toggle a single constraint in/out of the selection.
Right drag – Pan the camera.
Scroll – Zoom in/out.
Tip
Use Ctrl + A to select every visible constraint, then press U to
remove them all at once. This is handy for clearing auto-generated loop
closures and regenerating them with different parameters.
Startup Alignment
When the constraint set contains ABSOLUTE_POSE or ABSOLUTE_POINT
constraints and initial alignment is enabled, the first solve request
computes a best-fit rigid transform from those absolute constraints and
applies it to both the working Pose Optimizer trajectory and the raw
(pre-optimization) trajectory overlay. This dual application keeps the two
trajectories visually registered so you can compare them while inspecting
the initial GPS or survey alignment.
The alignment transform is returned by
PoseOptimizer.initialize_trajectory_alignment() (a 4×4 matrix; identity
if alignment is skipped).
Use --no-initial-align in ouster-cli to skip that startup transform.
Constraint visualization
PoseOptimizerViz renders constraint relationships with green lines:
Point-to-point constraints draw a line between the paired constraint points.
Pose-to-pose constraints draw a line between the two selected
LidarFrameposes.Absolute pose constraints draw a line between the target pose and the selected
LidarFramepose.Absolute point constraints draw a line between the target point and the selected 3D point.
Constraint labels include the constraint type, constraint id, and timestamps (when enabled).
Selected constraints are highlighted, and can be removed with
Uor by clicking the on-screen “Remove selected constraints” button.
The screenshots below show how those lines appear in the viewer:
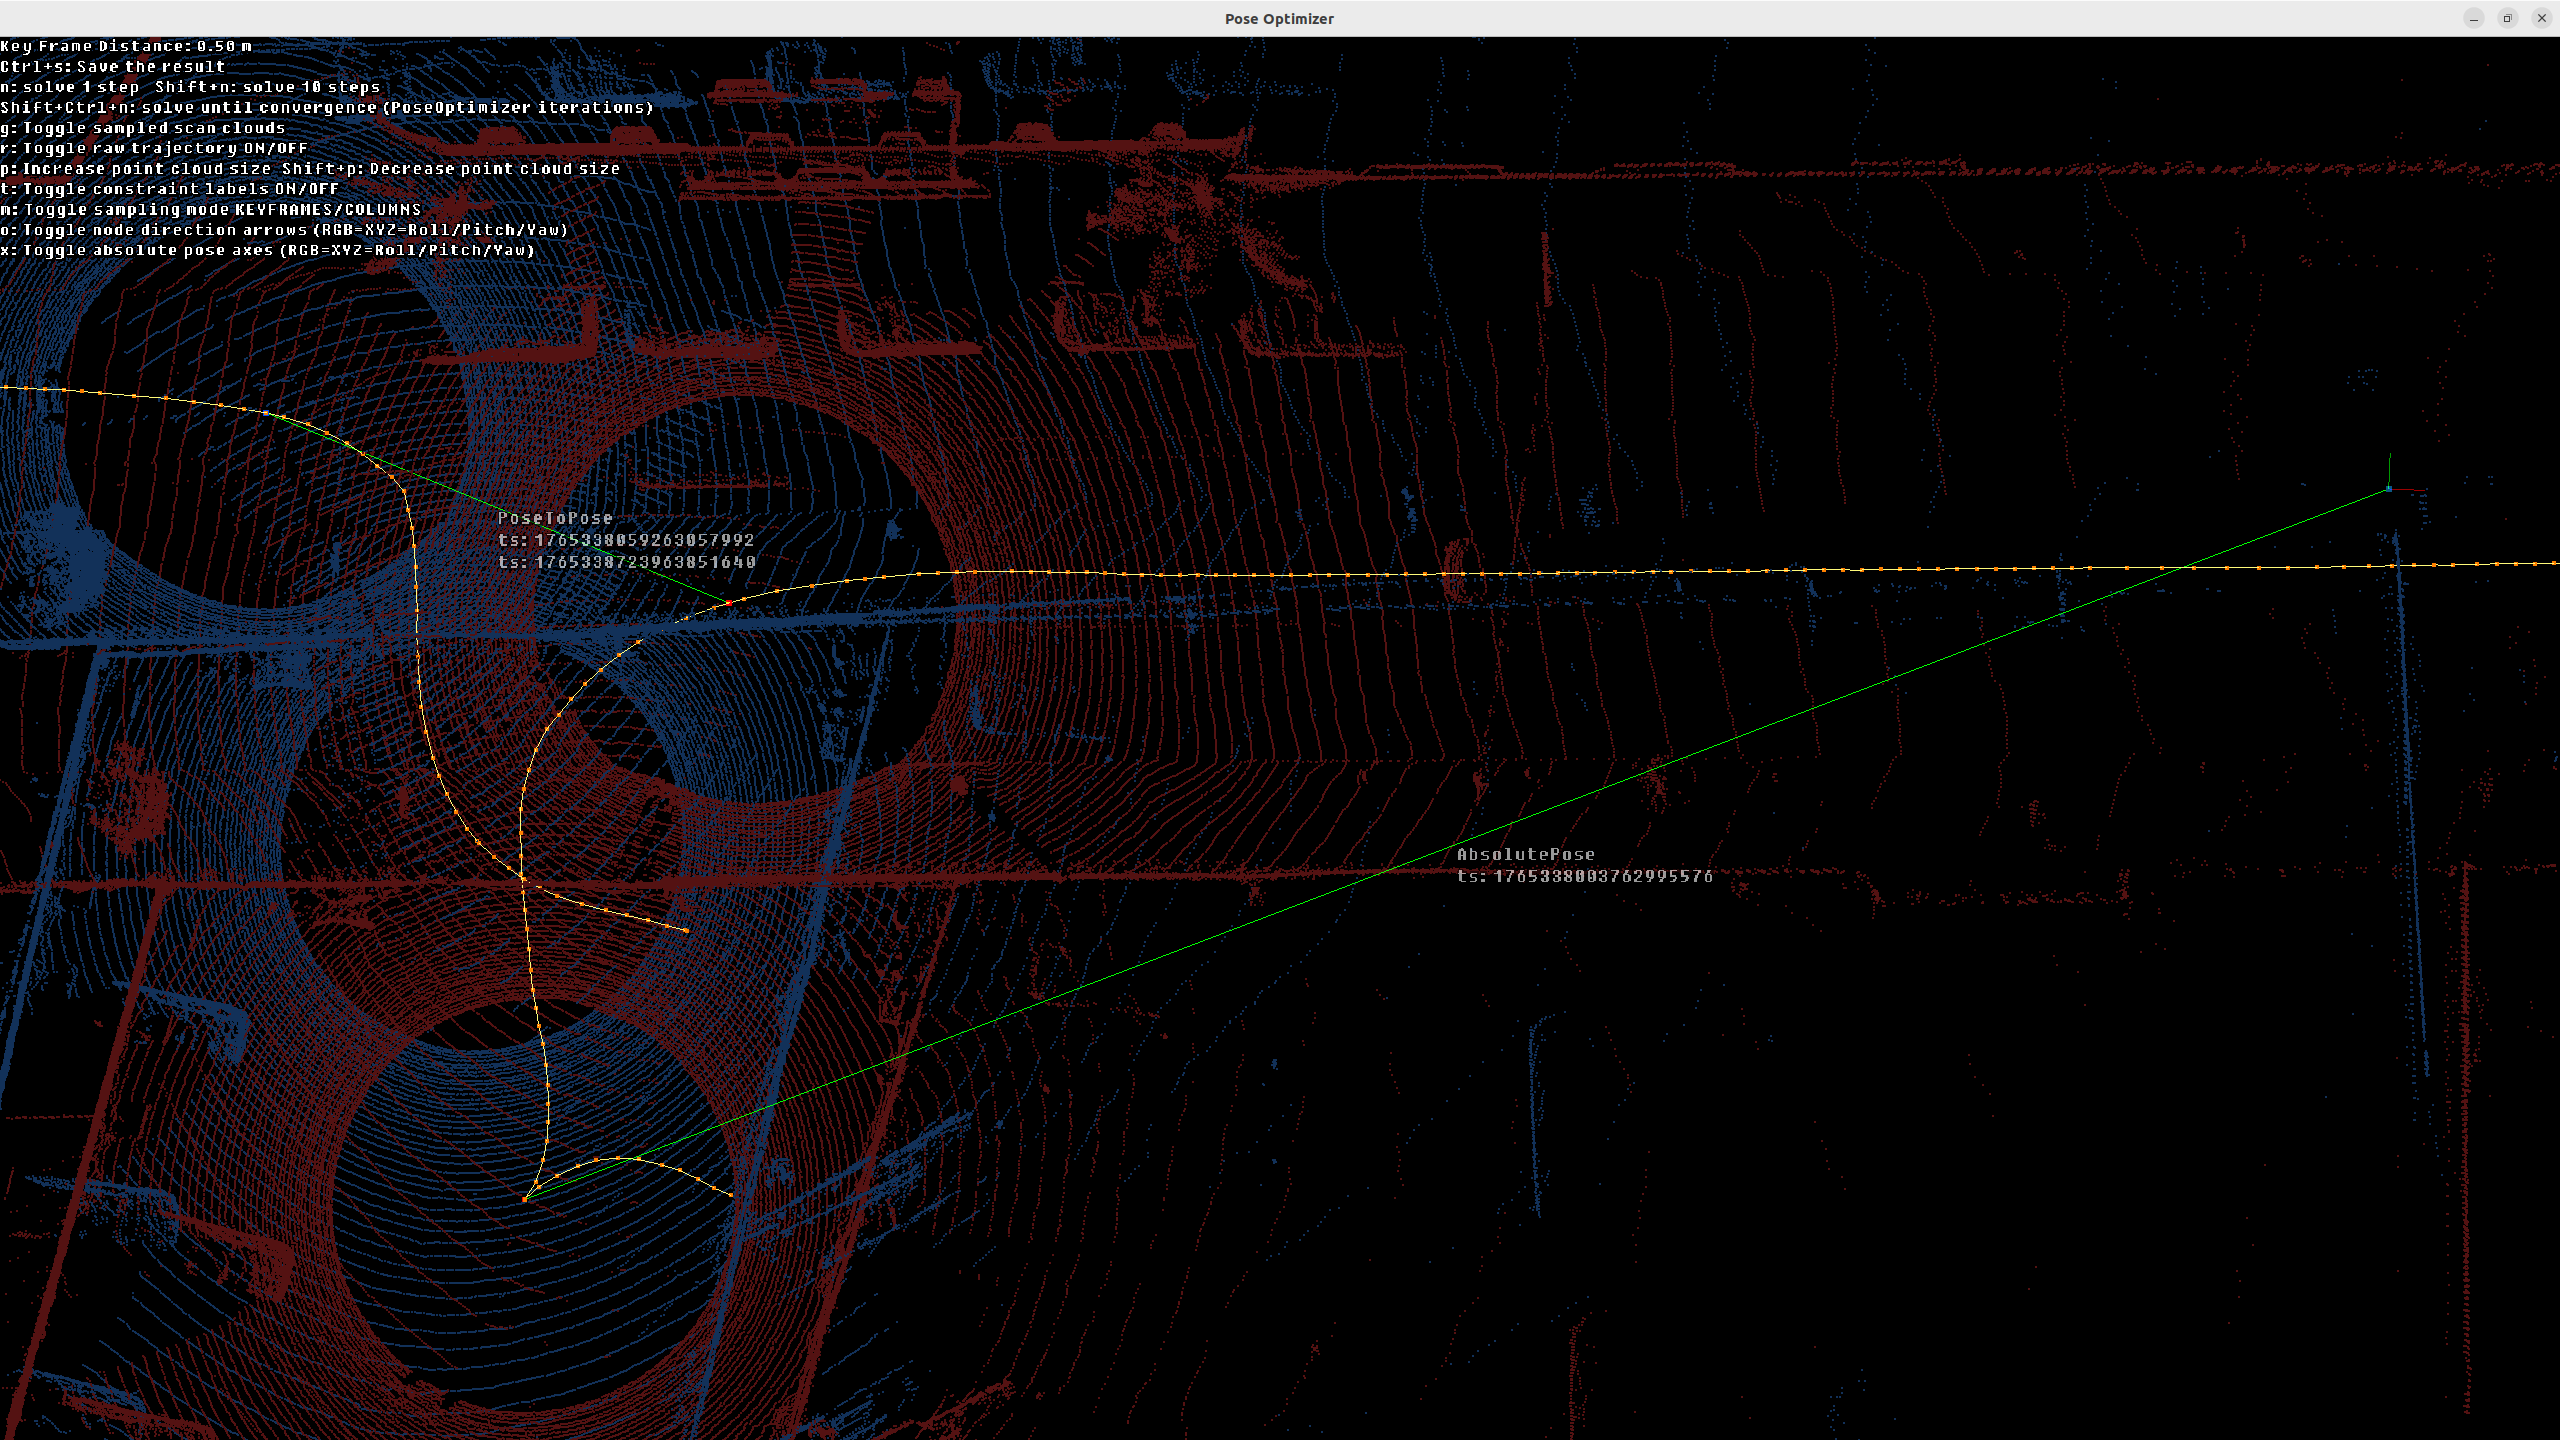
A point-to-point constraint and a pose-to-pose constraint with green lines between their paired targets.
Status & Output
The viewer writes progress messages (optimization steps, auto-loop detection,
gravity alignment, saves, point-size changes) to stdout and to the on-screen status bar. When you press
Ctrl + S, it writes the optimized OSF to the output name you provided; if
that file already exists it appends a number (e.g., optimized_loop1.osf)
without blocking the UI.